Presearch
At first, I had three main ideas for my final project. The first was a stormtrooper helmet. This would be 3D printed and assembled. I decided against this idea because I don't have the design skills or capabilities to generate the STL files for helmet parts. The second main idea was a flight simulator booth. This would be assembled out of PVC pipe. A TV screen would be mounted and flight controls and a seat/panels would be installed. I decided against this project because it would be too expensive and too large to fit in my house. The final idea I had was a Leslie cabinet. Leslie cabinets are a type of amplifier that are traditionally used with Hammond B3 organs. I have an organ of my own and thought it would be suiting to build one for my home use. Therefore, this is the project I settled on.
|
|
For reference, here is a demonstration of an actual Leslie 122 cabinet.
Watch 7:28 - 7:48 |
Step 1: General Design
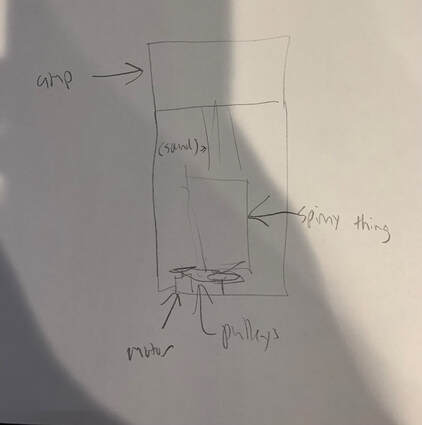
The general design of the Leslie cabinet had main parts. The first was the structure, which would be made out of wood. The second was the internal components, which would include the electronics, the motor, the pulleys, and an object that spins, all of which takes advantage of the doppler effect, distorting the sound of whatever is fed through an amplifier (positioned on top of the cabinet).
Step 2: Pulley Wheels
|

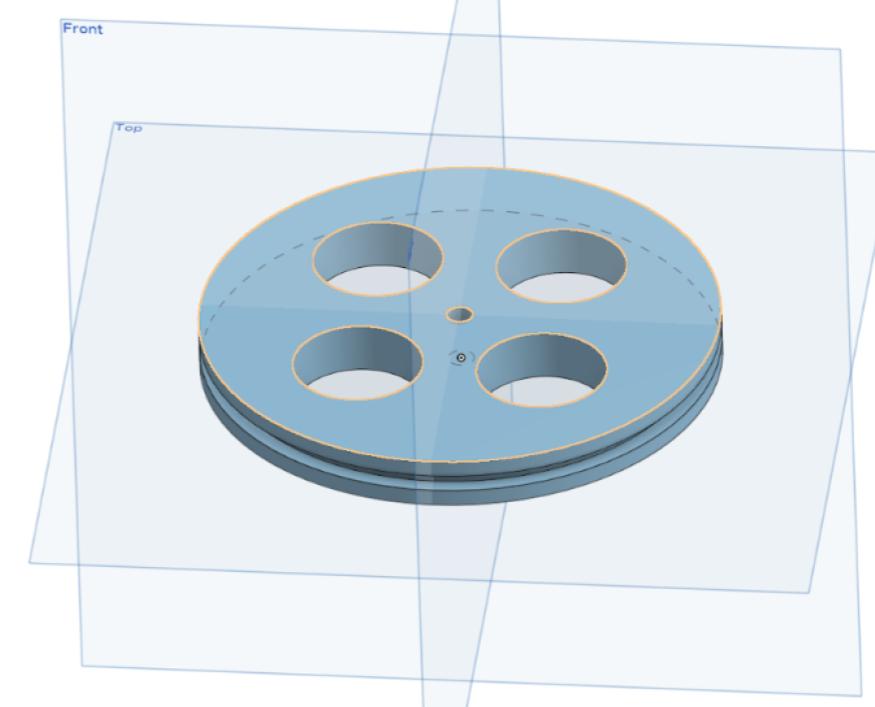
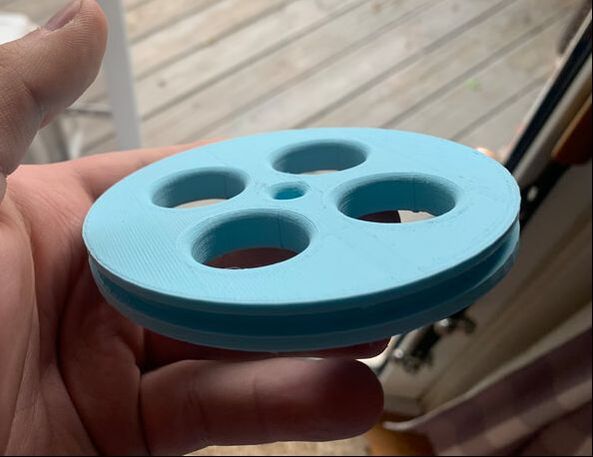
The first design I created for my final project was a pulley wheel. I designed the file in Onshape and printed it using a MakerBot Replicator+. Since this was the first design I was creating, I wasn't very picky about dimensions/sizes, so I more or less designed what looked best. I put holes in the mid-section of the wheel to reduce weight and to help its appearance. I wasn't aware that those hole would serve a much more fulfilling purpose later on.
|
|
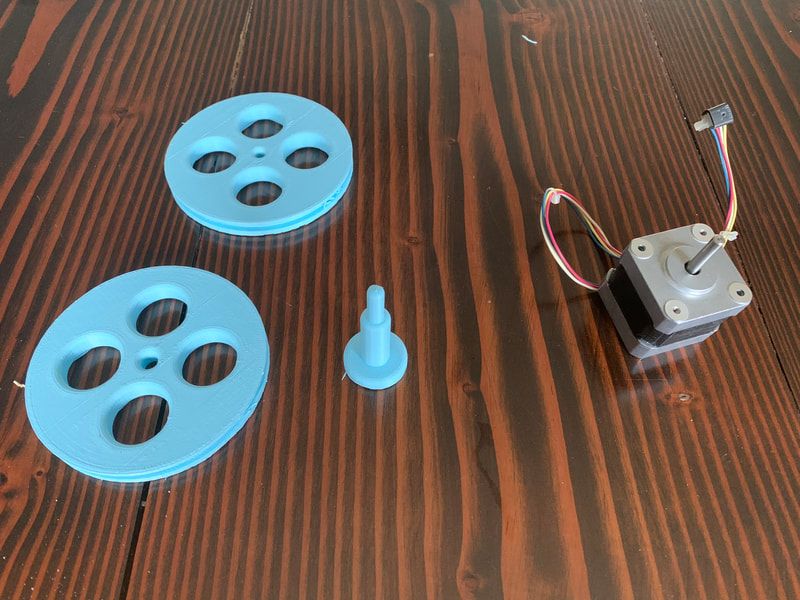
Step 2: Selecting a Motor

|
The Innovation Center had some left over stepper motors that were free for me to use. I found a few that would work with an Arduino rig and based my design off of their dimensions. I found that pretty much all stepper motors had the same rod diameter (about 0.2in), so I was able to swap motors in and out at my liking.
|
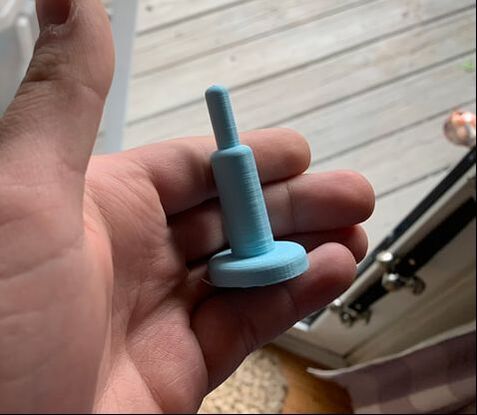
Step 3: Designing the Pulley Mount
|
|
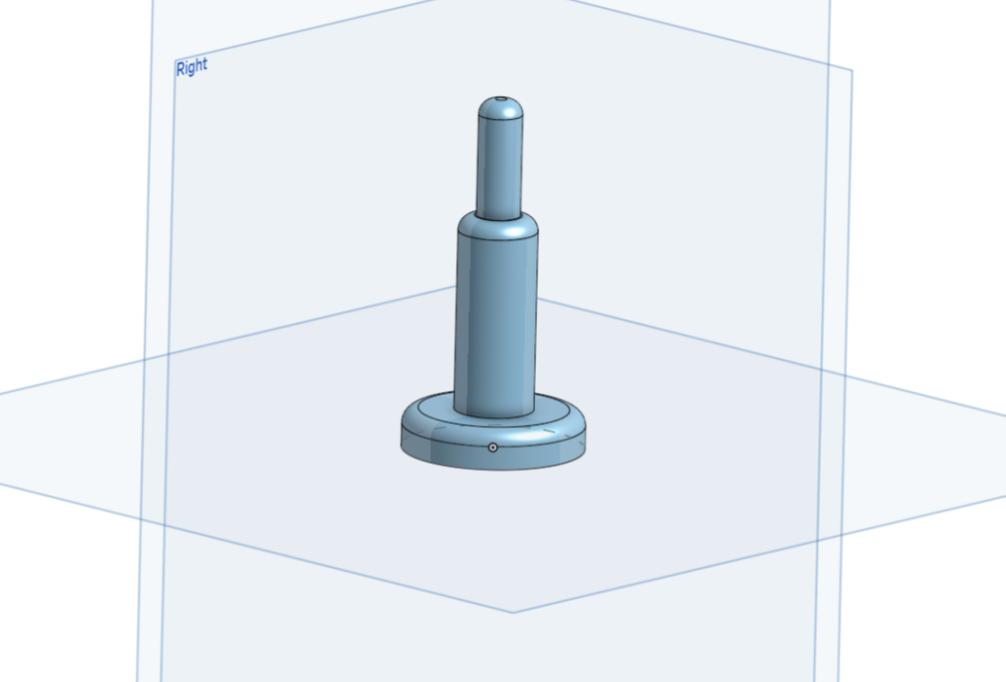
Because the motor placed a pulley wheel at an elevated level, I would need something to hold the second pulley wheel above ground. Both wheels would have to be level. So, I designed a pulley mount that held the second pulley wheel at the same height as the first. For this wheel, I changed the diameter to 0.3in to make the print a little more accurate.
|
|
After some quick tests with rubber bands as belts, it became clear that my pieces, especially my pulley mount, weren't very strong. It was hard to see how it would all come together and not crumble. However, I then realized that I didn't need a pulley system at all. I could mount the entire spinning apparatus on to the motor directly. I didn't completely abort the pulley system, but made sure to keep my mind open to all possibilities.
|
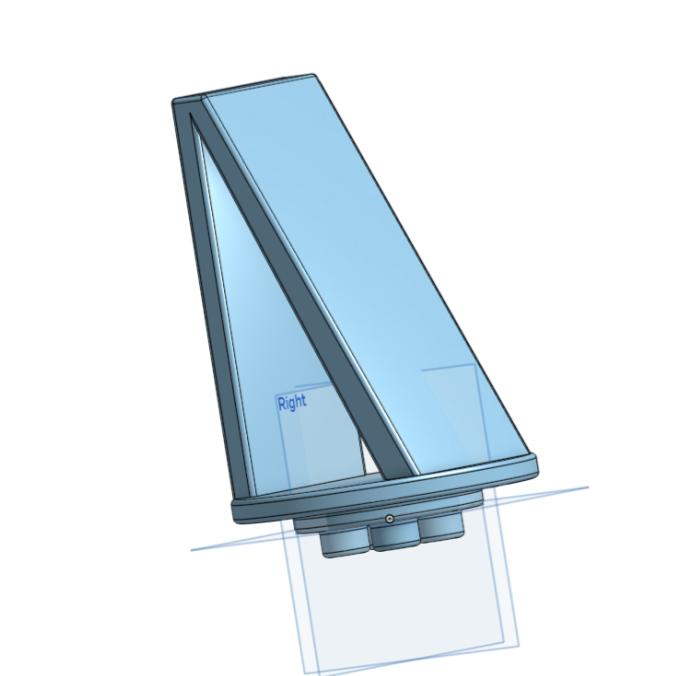
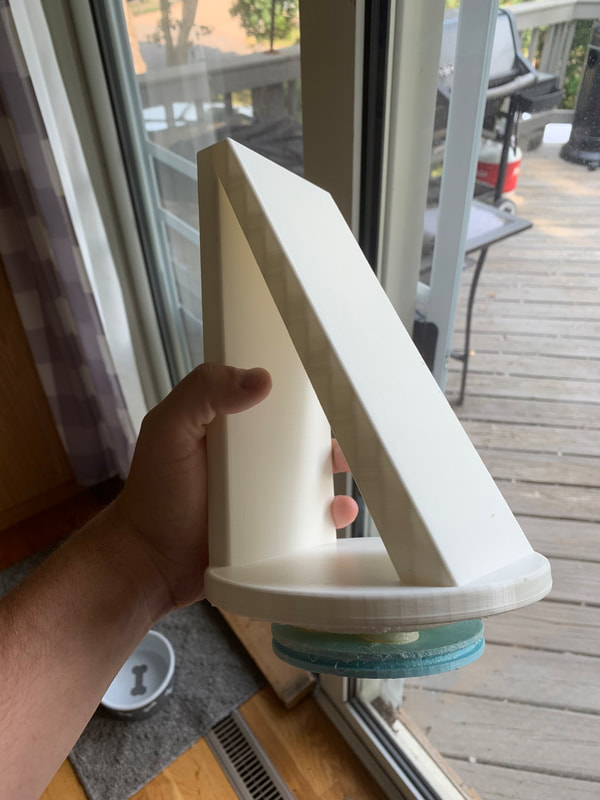
Step 4: Designing the Spinning Apparatus
|
|
This part of the project was difficult. I needed to design something that was large, lightweight, and would direct sound out. I found the easiest way to do this to be a 3D printed triangle. I decided to remove the entire pulley system and attach this part directly to the motor. To do this, I designed 4 legs that protrude from that bottom that fit into the holes I left in the pulleys. This creates a snug fit. I superglued these two parts together so I would be sure they didn't come apart.
|
Step 5: The Electronics
|
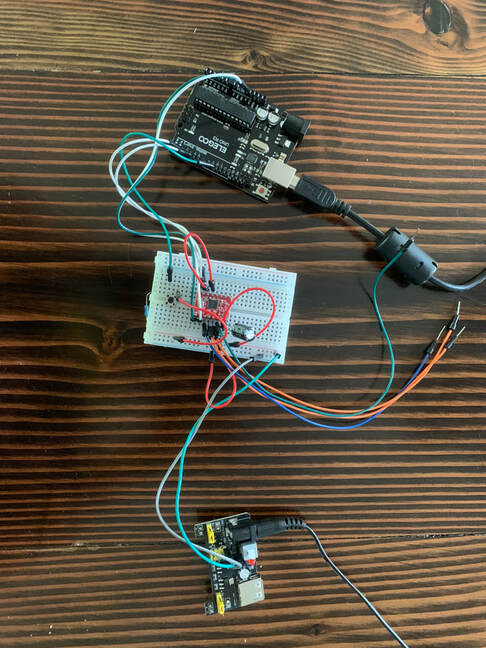
To run the motor, I ordered an off-brand Arduino Uno (top). I also ordered an Arduino supplies kit that included wires, capacitors, resistors, and more. I also salvaged an A4988 motor driver (middle) off of one of last year's Big IDEA projects. The Arduino kit I ordered included an external power device. This (bottom) powered the motor. After about an hour of focused work at home, I got my motor to turn.
|
The Code
|
|
I was able to successfully write code with the help of ChatGPT that successfully accelerates and decelerates the motor with the push of a button. I was able to manipulate the speeds of the motor by changing the initialStepDelay and alternateStepDelay variables. I found a slow speed that was stable and fast speed that was stable, and went with those.
|
|
Unfortunately I am unable to imbed a YouTube video because it claims my videos are "listed as private", but a video of my first test attached.
|
| ||
Step 6: The Structure
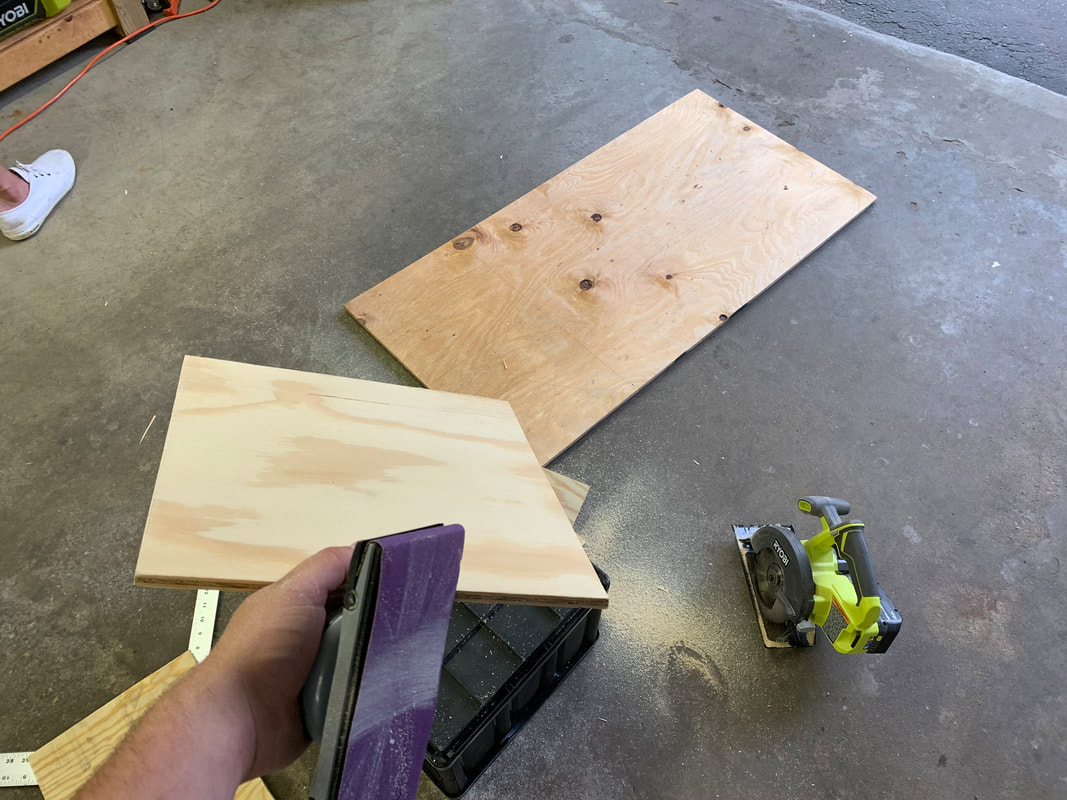
My cousin has a degree in Mechanical Engineering and was down to help me build the wooden structure for my Leslie cabinet. We got to work in his garage and were able to crank out the rest of the project in one night. I started with drawing out my design with dimensions. The box is 12.75"x12.75"x13.25". I cut all the panels using a handheld circular saw and a table saw. I then sanded the panels (seen below). After sanding I positioned the boards and traced a base panel. After cutting the base panel, I used a drill to make room for a handheld jigsaw to carve out the inside of the panels. After some quick assembly, it was done!
Step 7: Finishing Touches
|
|
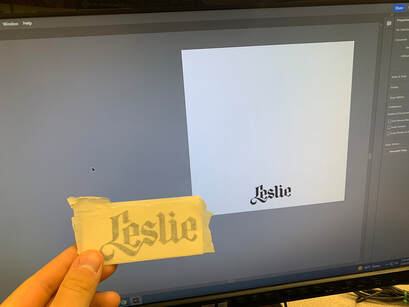
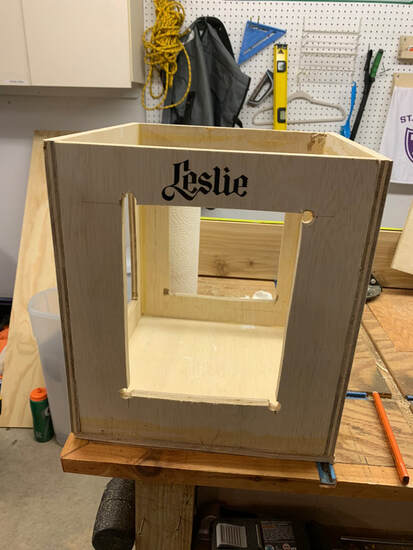
After assembling the box with a nail gun and some wood glue, I added the finishing touch: a Leslie logo vinyl decal. With this decal, I officially met the requirement of 3 machines used (3D printer, Arduino, vinyl cutter). Once the decal was on, things started to look real!
|
|
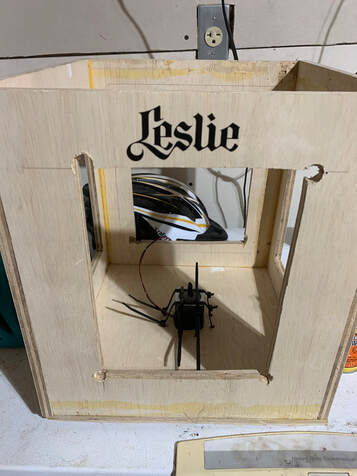
I then used a handheld router to carve a small indentation for the motor to rest inside of. Then I drilled 8 holes around the perimeter of the motor and strung zip-ties through to secure the motor. Now all that had to be done was the instillation of the spinning apparatus.
|
Attached is a video I took of my first test inside of the structure I built. As seen in the video, I designed a box with four sides and an open lid. I also cut openings in the four sides to allow me to position all of the internal components and to let sound out.
| ||
Step 8: Final Test
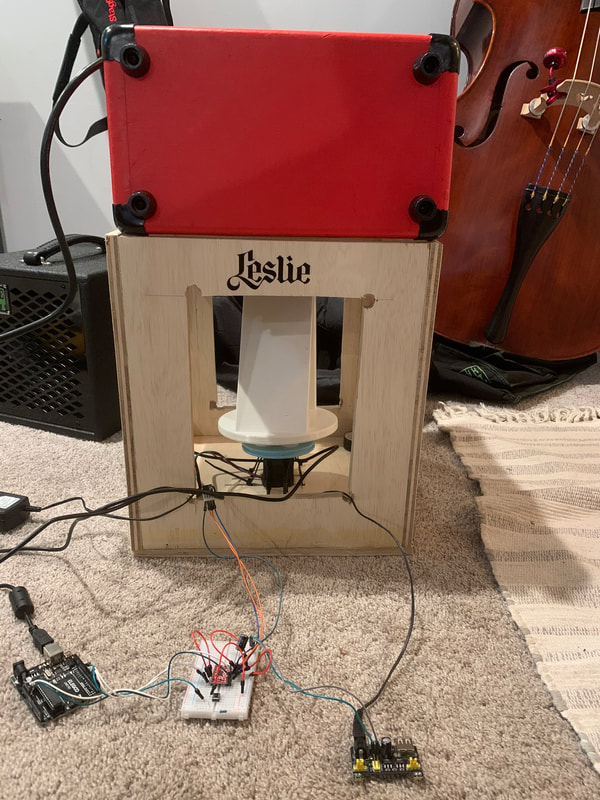
I attached the spinning apparatus using electrical tape and super glue to create a tight seal. I tested my finals project at both speeds, slow and fast. The top attachment is the slow test and the bottom attachment is the fast test.
| img_8659__2_.mp4 |
| img_8659__3_.mp4 |
Reflection
I sure did learn a lot over this semester project. I learned how much preparation needs to go into a project like this to make it work. I learned that sometimes you need to improvise, like when I figured out a pulley system wouldn't work. Most of all, I learned how to use an Arduino to operate complex systems. Before this project, I could barely build a basic circuit. Now I am able to generate code and understand it, which is a win in my book. I was also able to identify what parts I needed (like the motor driver and external power source), something I had no knowledge of before I embarked on this project.
I am pleased with my end product. While the classic Leslie effect isn't incredibly obvious, I did the best I could with my materials. I believe I would be able to replicate something very similar to what you hear on recordings if I had stronger materials, a more powerful motor driver and a bigger motor. However, I got everything done with the materials I provided for myself, so I am happy.
The thing that sticks out to me is that I didn't procrastinate. Usually, when it comes to a big project like this, I take my time and cram everything in the last week. However, with this project, I designed my parts at a steady pace. I wasn't stressed at the end and was able to produce a very reasonable final product. I am proud of myself for taking on something I didn't know how to do and taking care of business. I am pleased with my end product and am considering doing more like this in the future. Who knows, maybe I have a Leslie-building career in my future!
